ERPNext User Guide for Managing and Configuring TracCar Subscriptions
This guide provides a comprehensive overview of configuring and managing TracCar subscriptions within the ERPNext system. It covers everything from setting API credentials and creating subscription plans to adding TracCar devices and users. Various subscription scenarios are explained to show the features and capabilities of the app.
Configuration
Tip: For Configuration part, we need to do 3 things:
- Set TracCar API credentials.
- Create TracCar subscription plan.
- Configure Subscription Settings.
1. 1. Set TracCar API credentials
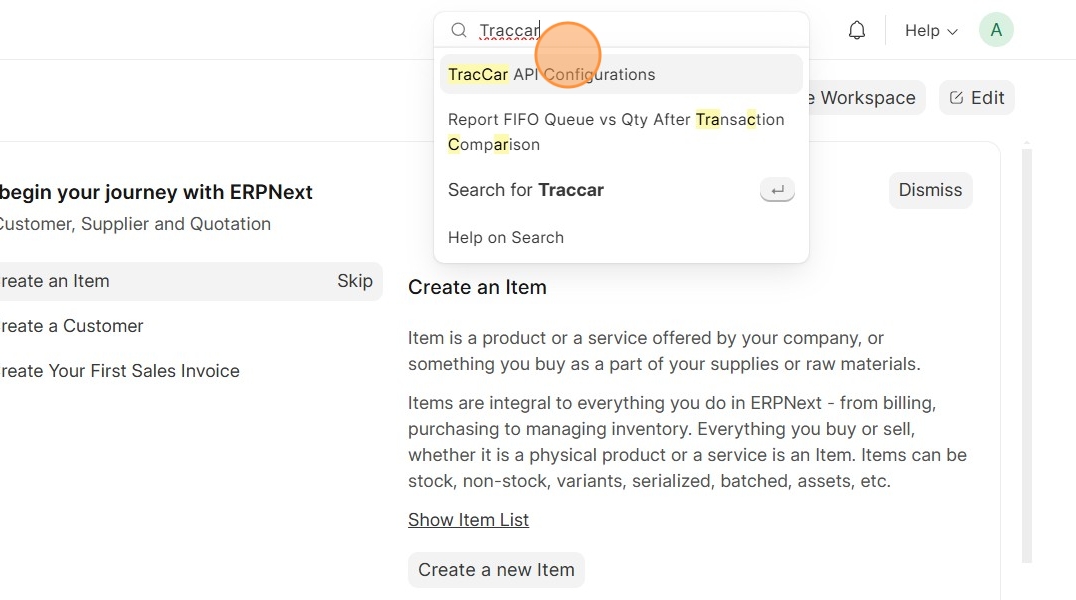
Using the search bar, go to TracCar API Configurations
2. Fill the Domain Name and Token values. (You can get the Token value from your TracCar admin account)
Note: Enter the Domain name value without the [[https://]] part.

3. When finish, click Save.

4. 2. Create TracCar subscription plan
Click on the Home icon ...

5. Click on Accounting module ...

6. Click on Subscription Plan ...

7. Click on Add Subscription Plan

8. Start filling the Subscription Plan values

9. Regarding the Item of the TracCar Subscription Plan, we need to create an item which is the Tracking service in the context of TracCar subscription.
Click on Create a new Item

10. Click Edit Full Form

11. Start filling the Item values ...

12. Make sure to uncheck the Maintain Stock checkbox, since it's a service and not a stock item

13. Check the other tabs and see if you like to configure another values. (Ex: You want TracCar subscriptions to deal with a specific revenue account, so you can configure that from Accounting tab)

14. When finish, click Save

15. You will be redirected back to the subscription plan with the Item field filled with the item that we just created

16. Continue filling the other values ...

17. When finish, click Save

18. 3. Configure Subscription Settings
Click on the Home icon ...

19. Click on Accounting module ...

20. Click on Subscription Settings

21. Check the parameters ...

22. If you made any changes, click Save

Create TracCar Subscription
23. To craete a new Subscription, go to Subscription page from the Accounting module as shown in the image below, or you can use the search bar

Tip: For TracCar Subscription, there are 2 ways to add devices (Trackers) to a TracCar subscription:
- Add devices manually by the administrator into the TracCar Devices table in the Subscription page as shown in the image below.
- Grant the user a permission to add devices by himself using his TracCar account, then you will fetch the them into the subscription page in ERPNext system using Fetch trackers button.
- In this guide we will do multiple scenarios for creating a TracCar subscription and will cover the both cases of adding Trackers.
Scenario 1 : Basic TracCar Subscription (Adding devices manually)
24. Click on Add Subscription

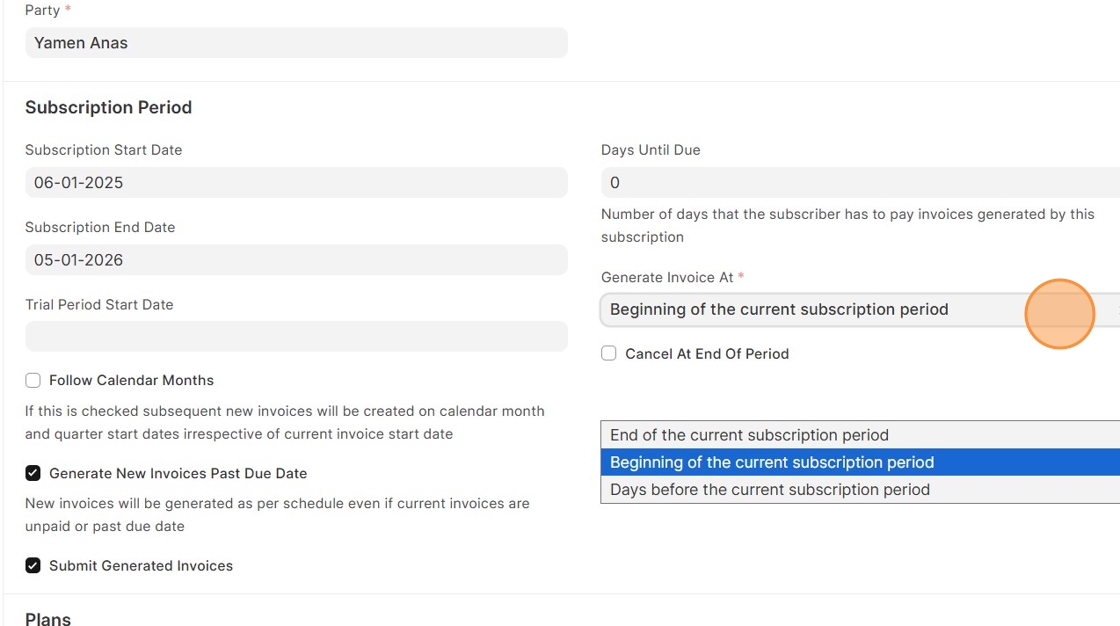
25. Start filling Subscription information ...

26. Continue filling information ...
27. For TracCar subscriptions, select the plan that you created for TracCar and enter the quantity number of the plan.
Note: The plan quantity number must be equal to the number of devices you add in TracCar Devices table)

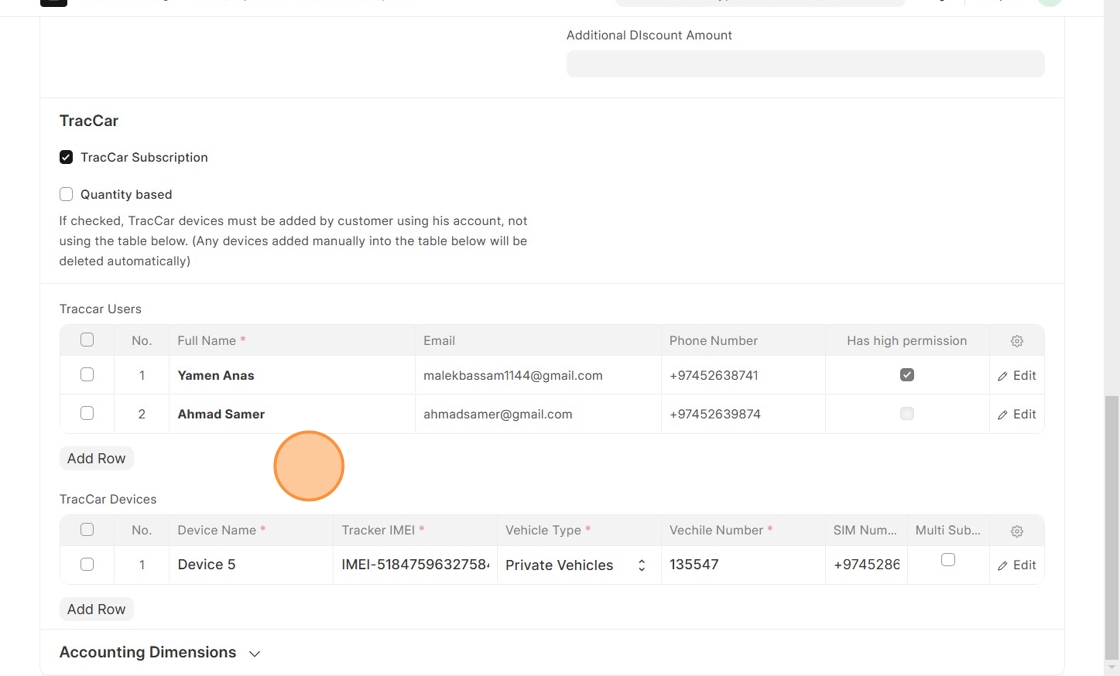
28. For TracCar Subscriptions, the checkbox TracCar Subscription must be checked

29. When TracCar Subscription checked, a new additional field and tables will appear related to TracCar as shown in the image below

30. Click on the Full Name field in TracCar Users table to add users, and a list of TracCar Contacts will be listed as options to select from. If you want to create a new Contact, click on Create a new Contact button at the bottom of the list.
- Select the TracCar users that will be included in the subscription

Tip: Regarding TracCar Users table:
In the context of ERPNext system it's just a TracCar Contact related to the customer you are selling the subscription to.
But in the context of TracCar system, it's a User.
In other words, it's a contact in ERPNext system and when we add it in TracCar Users table in the subscription page and save the subscription, a User will be created in TracCar system against this contact.
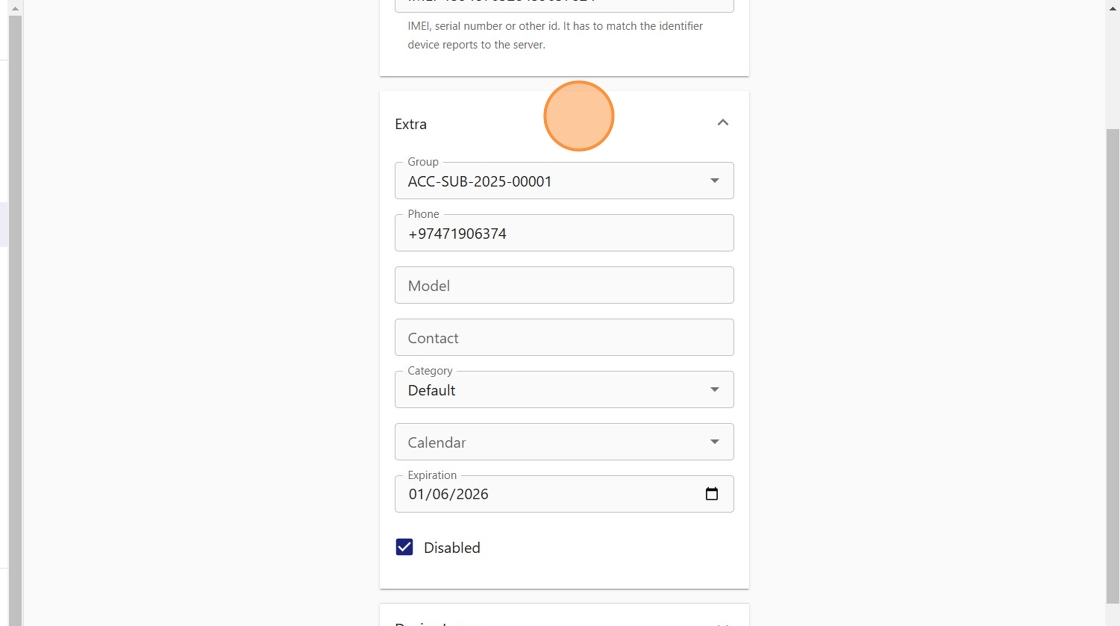
31. Let's create a new Contact by clicking on Create a new Contact button, then start filling the contact information
Note: Make sure to keep the User Id field empty, as it's just a Contact in ERPNext and not a User

32. Enter the Email ID and check the Is Primary checkbox

33. Enter a Mobile number and check Is Primary Mobile checkbox

34. Check Is TracCar Contact Checkbox since it's a TracCar Contact

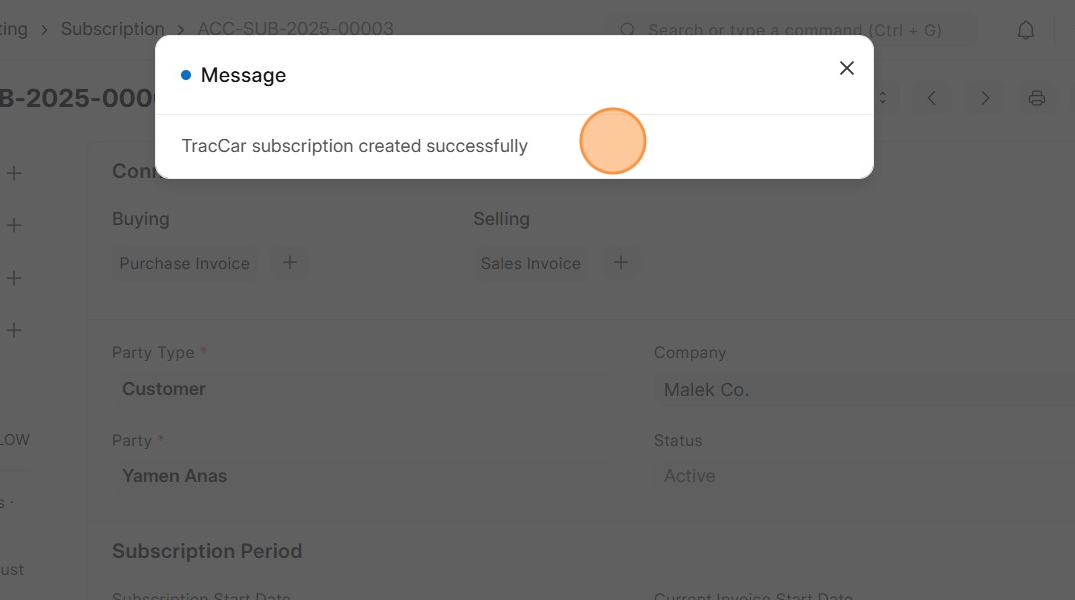
35. When finish, click Save

36. Back to the subscription, select the Contact you have just created

37. Check Has high permission checkbox for the selected contact.
Note: For each TracCar subscription, one contact must be specified as a main TracCar User.

38. Add Traccar devices ...

39. Click on Edit to view the device full information

40. See that the Status of the device is New for now

41. Click Save

42.

43. Note that the status of the subscription is Active but this is not the actual status because the customer didn't pay for it yet

44. So, to update the subscription status, click on Fetch Subscription Updates

45.

46. Note that the status of the subscription is updated

47. Click on Edit icon of the device ..

48. For the status, it's disabled as the customer didn't pay for the subscription yet

49. Also, you can see that a sales invoice has created for the subscription

50. Let's see how this subscription is reflected in TracCar system.
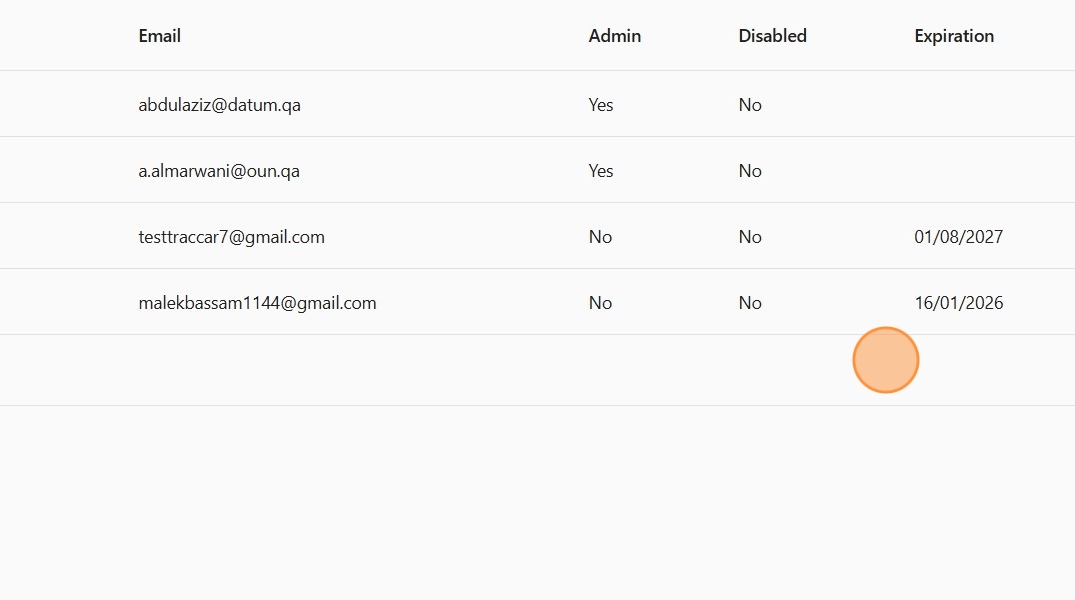
Login to the Admin account in TracCar, then click on Usres from the left side bar to see all users.
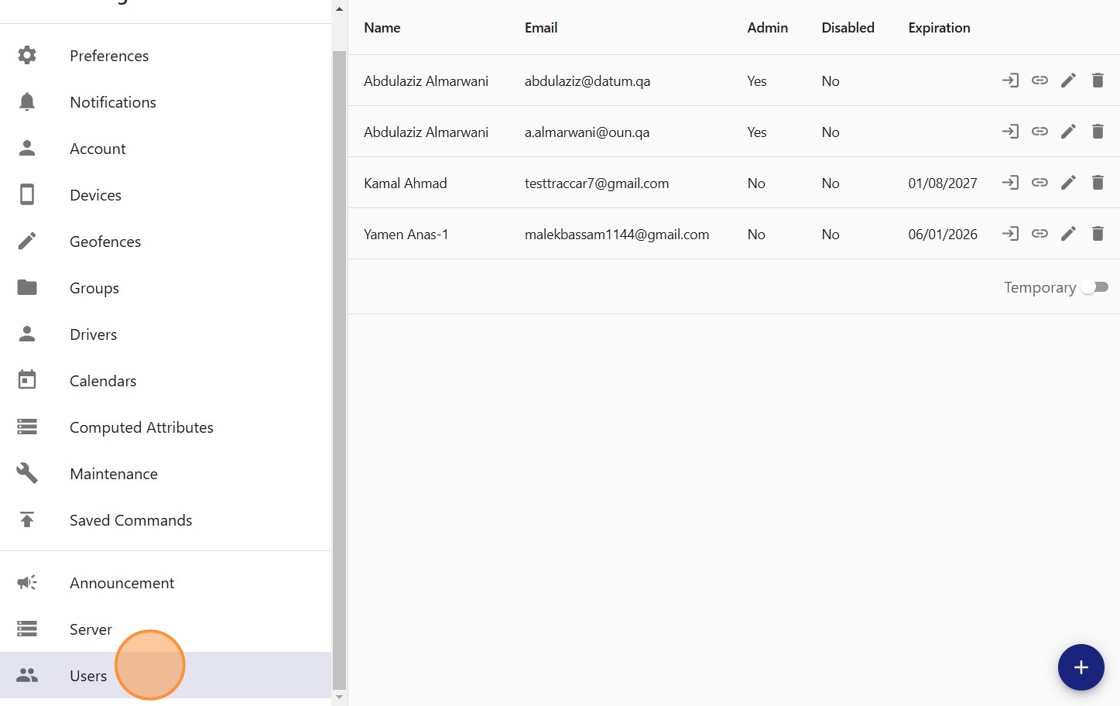
51. See the new Yamen Anas-1 User created

52. Click on the Connections icon for the User
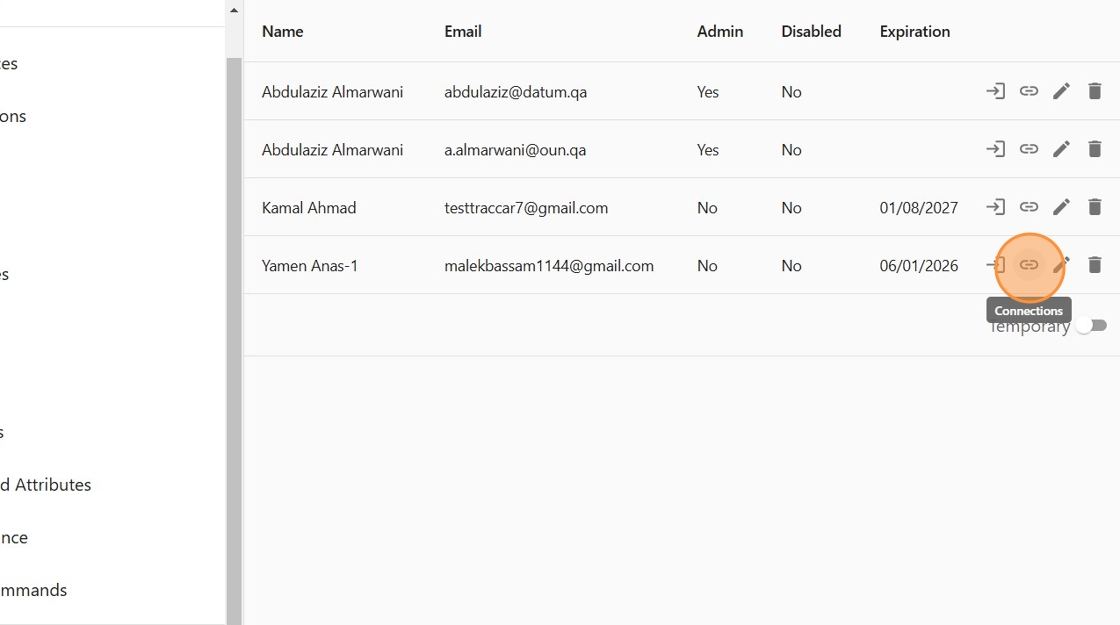
53. See that the device you added in the subscription is connected with him

54. Click on Edit icon to see the details for this user

55.

56.

57.

58. click on Devices from the left side bar to see all devices.

59. See the new Device 1 created as per we entered in the subscription

60. Click on Edit icon to see the details for this device

61.

62. Note that the status of the device is disabled for now as the subscription is not paid yet
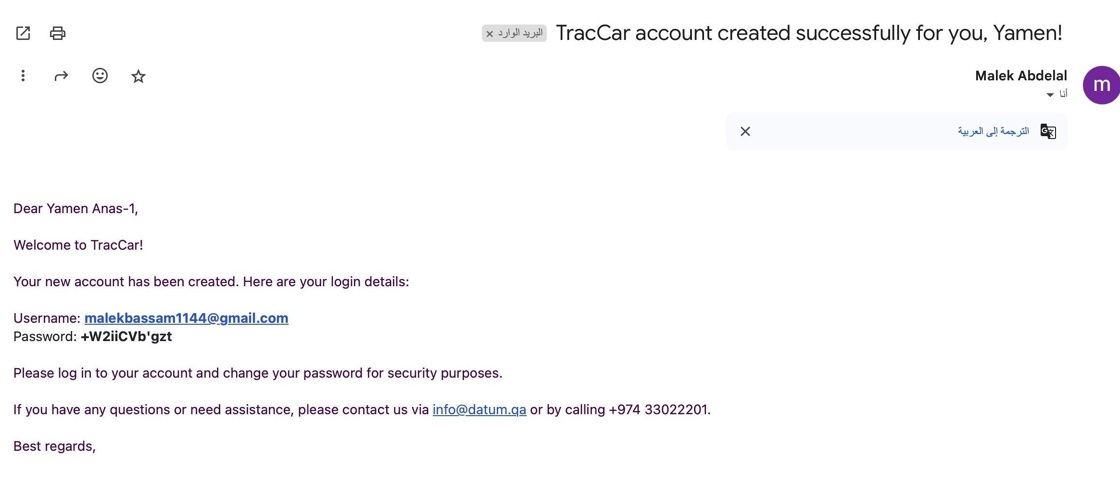
Tip: For each new user created in TracCar system, he will receive an email contains the TracCar user account information and credentials, so he can login to his account and see his account information and the devices connected to him with a confined permissions.
63. Here is how the email looks like

Tip: For any TracCar subscription, you can update the information of a User or a Device from the subscription page in ERPNext, and it will updated in TracCar system automatically.
64. Let's try updating the SIM Number of the deivce (Last 2 digits updated to be 55)

65. Click Save

66.

67. Note that it's updated in TracCar system too.

Subscription payment Process
68. From the subscription page, click on the Sales Invoice connection

69.

70.

71. From the Sales Invoice, you can create a payment entry or payment request so the customer can pay for it.

72. After paying the sales invoice amount, the status will be updated to be paid

73. And for the Subscription, click Fetch Subscription Updates

74.

75. See that the status of the subscription is Active now

76. Click on Edit icon for the device

77. see that it's status is updated to be Active as well

78. And from the TracCar system side, click on the device to check that it's status is updated

79. See that it's Enabled now

Senario 2 : Update TracCar User Expiration Date
Tip: Info: The expiration date of the TracCar user is equal to the latest expiration date of a device connected to him. (The expiration date of a device is always equal to the expiration date of the subscription)
- In the previous scenario, the user Yamen Anas created with one device connected to him, which means the expiration date of him now is the same of the expiration date of the device.
- In this scenario, we will create another subscription with a newer expiration date for the same user with 2 new device and will see how the expiration date of the user will be updated.
80. Go back to the subscription list

81. Click Add Subscription

82. Start filling the subscription information ...

83. Note that the subscription expiration date is newer than the previous subscription. (The expiration date of the previous one is 06-01-2026)

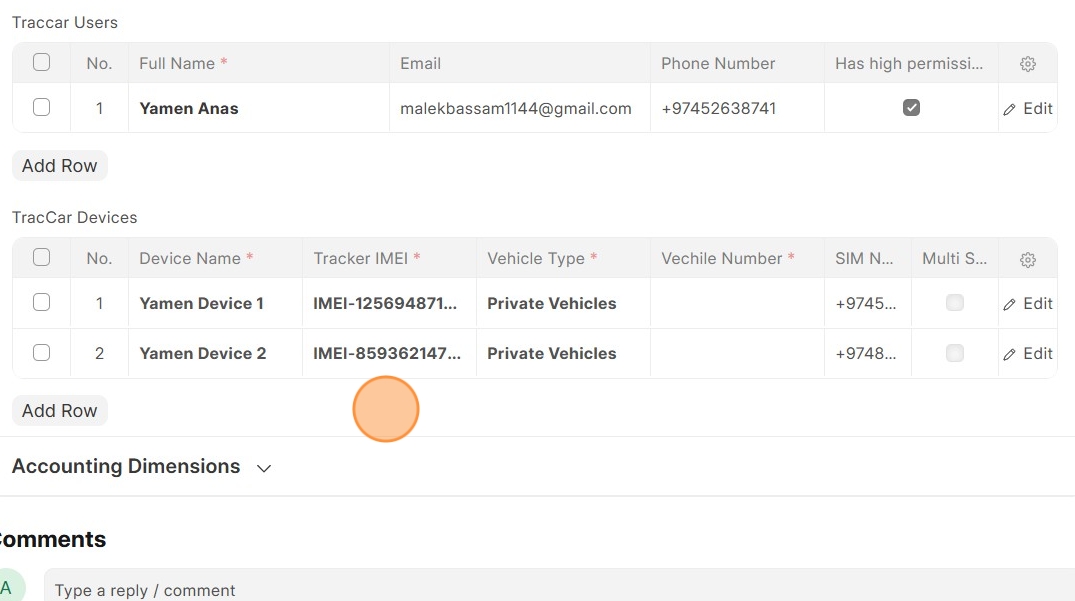
84. We selected the same user and added 2 new devices ...

85. Make sure that the number of TracCar devices must be equal to the plan quantity number

86. When finish, click Save

87.

88. See the previous expiration date of the customer, refresh the page to see the change

89. Note that it's updated successfully
90. And here are the new 2 devices that we added in this subscription

91. Click on Connections icon for the customer ...

92. From here you can see all devices connected with the customer

93. Click on the Edit icon ...

94. See that the the Device limit of the customer updated accordingly as we connected 2 new devices to him

Senario 3 : Create Subscription with "Multi Subscription" Device
Tip: In this scenario, we will create a subscription with 2 users and 1 Multi subscription device.
95. Go to the subscription list ..

96. Click Add Subscription

97. Start filling subscription information ...

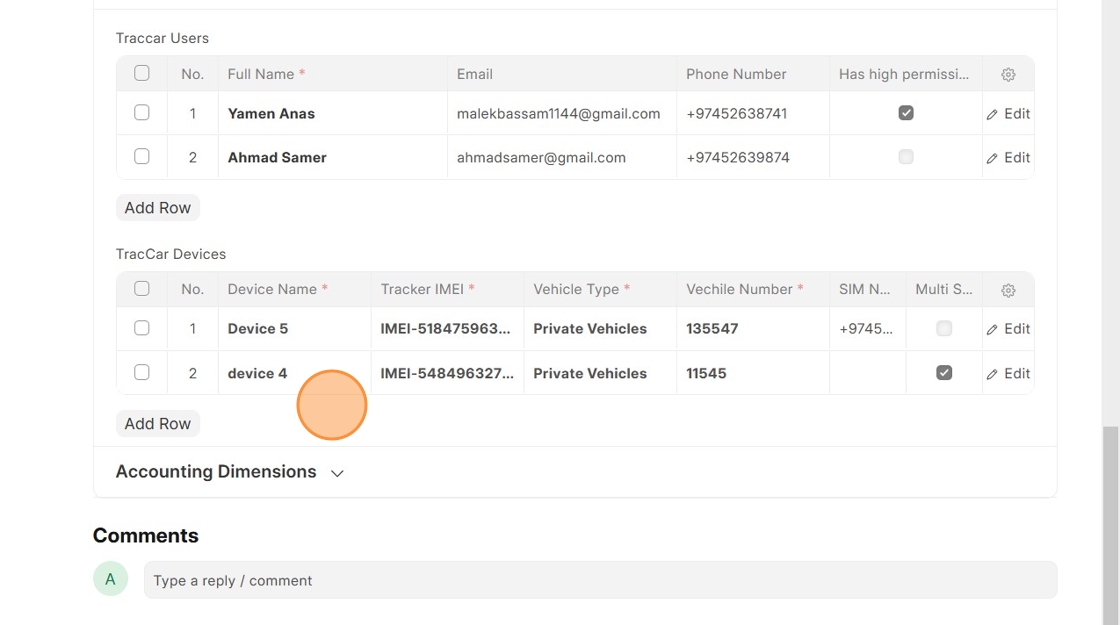
98. As you can see in the image below, 2 users added (Ahmad Samer is a new user), in addition to 1 device.
For TracCar devices, you cannot add one device in multiple subscriptions unless you mark it as Multi Subscription. So, to be able to add a device in multiple subscriptions, you have to check the Multi Subscription checkbox for it.
Let's mark this TracCar device as a Multi Subscription device

99. When finish, click Save

100.
101. See the new Ahmad Samer user created, click on Connections icon

102. Note that the device 4 we added in the subscription is connected with him, and it's connected with Yamen Anas user as well

103. Click on Edit icon

104. See that the Device Limit for Ahmad Samer is 0 because he's a normal user, and the main user is Yamen Anas as we selected in the subscription.
Also, note that the Readonly and Device Readonly is checked for him. (These 2 fields will be unchecked only for the main user)

Senario 4 : Add a "Multi Subscription" Device into Another TracCar Subscription
105. Go to the subscription list

106. Click Add Subscription

107. Start filling subscription information ..

108. As you can see in the image below, we added 2 users and 1 new device normally, and the multi subscription device isn't added yet (We will save the subscription then add it).
109. Click Save

110.

111. In the previous subscription, we added device 4 and we marked it as a Multi Subscription device. So, to add it to this subscription also, from Actions button click on Add TracCar Multi Subscription devices

112. A dialog will appear contains all Multi Subscription devices, select the devices you want to add in the subscription (In our case we will add device 4).

113. Click on Get Items

114. device 4 is added now to the table of TracCar Devices
115. Click Save

116.

117. From the TracCar system side, see the new device 5 created

118. And for the users of the subscription, see that they are connected with device 4 and device 5

119.

Senario 5 : Grant the TracCar User a Permission to Add Devices (Quantity Based)
Tip: As we mentioned before, there are 2 ways to add devices (Trackers) to a TracCar subscription:
- Add devices manually by the administrator into the TracCar Devices table in the Subscription page. (As we did in the previous 5 scenarios)
- Grant the user a permission to add devices by himself using his TracCar account.
In this scenario, we will explain the second way
120. Go to the Subscription list and click Add Subscription

121. Start filling subscription information ..

122. In the case of granting the user a permission to add devices using his TracCar account, you have to check the Quantity based checkbox and then enter the Device Quantity the user wants to buy and add as shown in the image below.
- Device Quantity must be equal to the Plan Quantity.

123. For TracCar subscriptions of type Quantity based, TracCar Devices table has to be empty when saving the subscription

124. When finish, click Save

125.

126. From TracCar account, click on the Edit icon for the created Yamen Anas user

127. See that he has now a permission to add 2 devices

Tip: When creating a TracCar subscription of type Quantity based, the main user will receive an email notifying him about the new subscription and the number of devices he can add, in addition to the group name he has to add the new devices to
128. Here is how the email looks like

129. In this scenario, we created this new user so he will receive this email as well
130. After the customer/TracCar User added the devices, you can fetch them to the subscription page in ERPNext by clicking on Fetch Trackers button

131.

132. As you can see, here are the devices your customer added
133. Enter the Vechile Number for each device as it's a mandatory field

134. Click on Edit icon of any fetched device ..

135. See that Fetched field is checked.
By this field, for devices in any subscription, you can find out whether you added the device manually from the subscription page or whether they were added by the customer and then you fetched them.

136. Click Save

137.

138. From Actions button, click on Fetch Subscription Updates

139. Now, if you check the devices details from TracCar system side, you can find that it's updated as per the subscription information in ERPNext including the expiration date

Tip: - You can do any update on the subscription in ERPNext and it will be reflected in the TrcaCar system (Ex: updating the Devices Quantity).
- In case your customer makes any update on the devices information, you can fetch that updates simply by clicking on Fetch Trackers button again.