System user guide for dealing with Tess Reconceliation module
This module streamlines the reconciliation process of Tess payments by fetching Tess settlement reports from Dropbox into ERPNext. It supports both scheduled and manual fetching, ensuring all transactions are validated against Payment Entries and logging any discrepancies in 'Tess Statement Log' for user follow-up.
Set Up Dropbox Account
Tip: In this section of the guide, you will create an app in which the Tess settlement reports will be stored within your Dropbox account and configure its permissions.
1. Login to your Dropbox account, then click on Account icon

2. Click on Settings

3. Click Apps tab

4. Click on App Centre

5. At the bottom of the left sidebar, click on Build an app

6. Click Create apps

7. Click on Scoped access

8. Select Full Dropbox – Access to all files and folders in a user's Dropbox.

9. Inter your App name

10. Then click Create app

11. After creating your app, this app settings page will appear. Click on Enable additional teams

12. Click Okay

13. Click on Enable additional users

14. Click Okay

15. In the Redirect URIs field, paste the following link:
[[https://example.com/api/method/oun_tess_integration.tess_reconciliation.dropbox_integration.dropbox_auth_finish]]
- Make sure to replace [[example.com]] with the domain name of your ERPNext system.

16. Click Add

17. Go to Permissions tab

18. Within Files and Folders section, select files.metadata.read

19. And files.content.read

20. Click Submit to save the changes.

Tip: If you have face any issues while setting up your Dropbox account or need assistance, please contact us via info@oun.qa.
Configuration in EPRNext System
21. Login to your ERPNext system, then navigate to Tess Settings List using the search bar

22. Click on the Tess Settings that you use for Tess payments

23. Select the accounts that will be used for handling Tess payments:
Receivable Tess Payments Bank Account: The bank account designated to receive payments from Tess
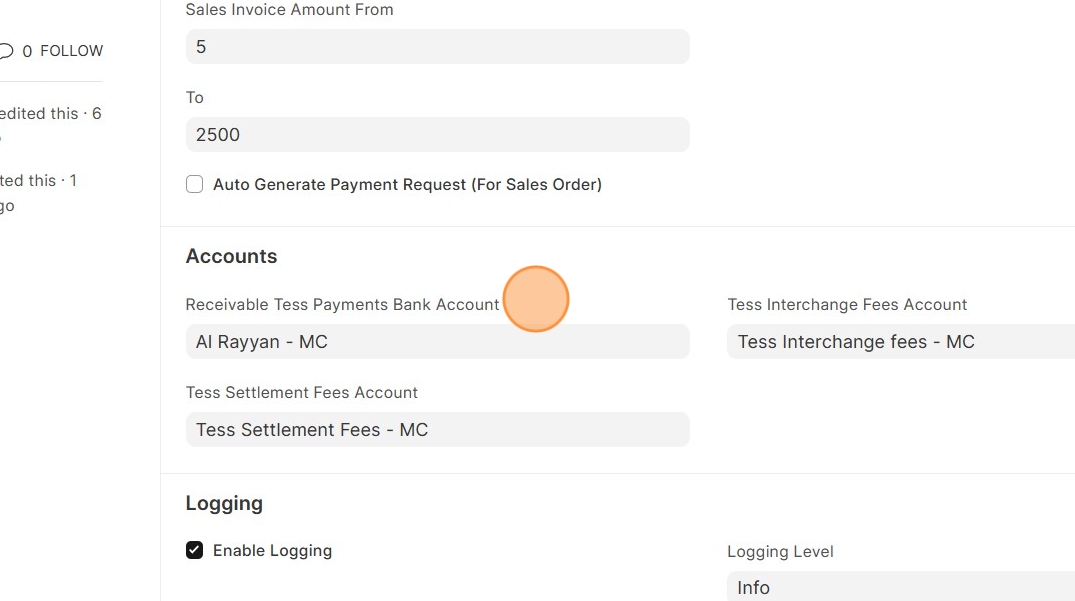
24. Tess Interchange Fees Account: The expense account used to record fees deducted by Tess for processing payments.

25. Tess Settlement Fees Account: The expense account used to record fees associated with the settlement process by Tess.

26. After selecting these three accounts, click on Save

27. Navigate to the Mode of Payment List to ensure that we have a payment mode of type:
- Tess (with the default account configured)
- Bank
If either of these is not exist, create it.

28. 1. Tess mode of payment (with the default account configured)

29. 2. Bank mode of payment

30. Navigate to Tess Settlement Settings

31. Click on Enabled, to enable the fetching of Tess Settlement reports from Dropbox

32. Start filling in the setting values ...
From your Dropbox app where Tess uploads the settlement reports, you can find the App Access Key and App Secret Key. Copy them and paste them here.

33. Select Reports Fetch Start Date.
All reports from this date onward will be fetched, meaning all transactions performed on or after this date will be included.

34. For Date of Last Report Processed field, you don't have to fill this date because it will be configured and updated automatically after each fetching process, so keep it empty now.
Note: On the first fetch, the system will retrieve all reports from the Reports Fetch Start Date onward. After the initial fetch, the Date of Last Report Processed will be automatically recorded, and subsequent fetches (via scheduler or manually) will only include reports after that date.

35. Click on Enable Dropbox Schedule, to enable the auto fetching and processing of Tess settlement reports on the selected date and time

36. Select the days and the time

37. When finish, click on Save

38. Click on Allow Dropbox Access button, to let ERPNext have access to your Dropbox account

39. You will be redirected to a page like this, click on Allow and you will then be redirected back to ERPNext

Tip: Congratulations! You have completed the configuration part.
Scheduled Tess Settlement Report Fetching
40. When the scheduled time to fetch Tess settlement reports from Dropbox arrives, you will find all transaction records fetched and stored in the Tess Statement page.

41. And for any discrepancies found between transactions in the settlement reports and payment entries in your ERPNext system, they will be logged with full details in the Tess Statement Log.
Tip: We will go over the details of the Tess Statement record and Tess Statement Log record later in this guide.
Manually Fetch Tess Settlement Reports
42. You have the option to fetch the Tess settlement reports manually by clicking on Get Tess Settlement Reports From Dropbox button.

43.

44. Upon successful fetching, you can find all transaction records in the Tess Statement page.
And if any discrepancies were found, a message will appear asking you to check Tess Settlement Log.

45. In case of no Tess settlement reports found to be fetched and processed for the period and dates configured in settings, a message will appear noting that.

Tess Statement
46. When you click on any Tess Statement, you will see all the details about that statement/transaction, including:
- File Name: The name of the report to which this Tess Statement belongs.
- Serial No: The serial number of this transaction within the Tess settlement report.
- Corresponding Journal Entry: A link to the journal entry created for all transactions in the report that this transaction is part of. (One journal entry will be created for each settlement report)
Additional details are shown in the image below.

47. Click on the Corresponding Journal Entry

48. Here’s how the journal entry may look.

Tip: Note that the journal entry includes the settlement report as an attachment in the left sidebar.
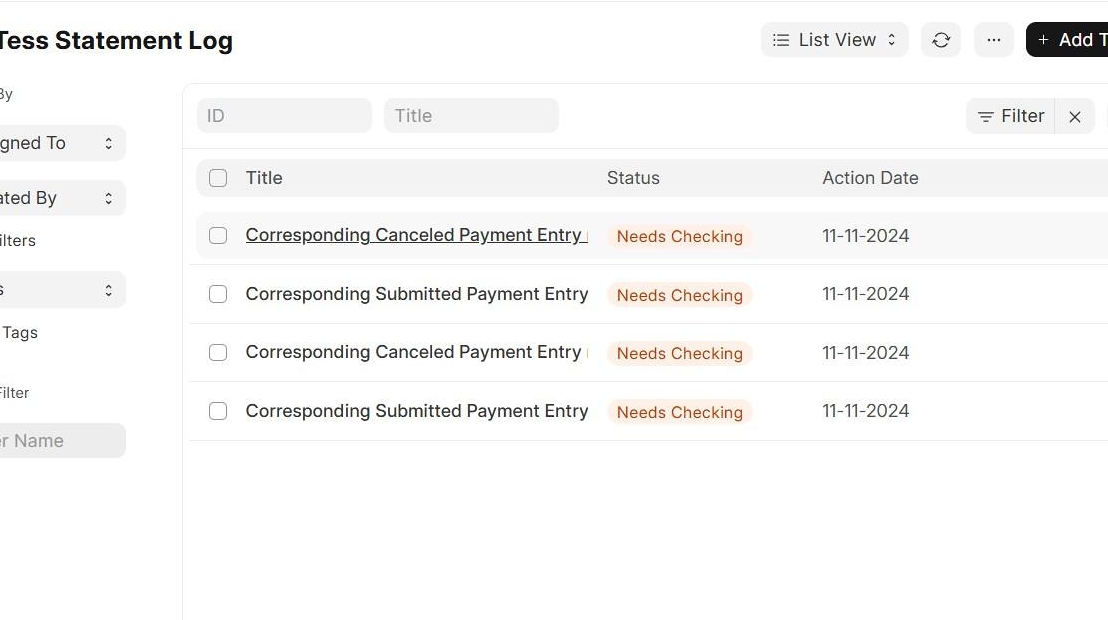
Tess Statement Log
Tip: For each sale transaction in the Tess settlement report, there should be a corresponding submitted payment entry in the ERPNext system. Similarly, for each refund transaction, there should be a corresponding canceled payment entry.
If any discrepancies are found (such as a sale transaction without a submitted payment entry in the system), they will be logged with all details on the Tess Statement Log page.
49. The initial status of a Tess Statement Log is [[Needs Checking]]

50. When you click on a Tess Statement Log, you can see it's details including the description. So, you have to check the issue and handle it.

51. The issue can be resolved using either a journal entry or a payment entry. Once you've handled the issue, select the method used (journal entry or payment entry)

52. Also, specify the document name (either the journal entry name or the payment entry name) that was used to address it.

53. Once you have finished checking and resolved the issue, click Checked.
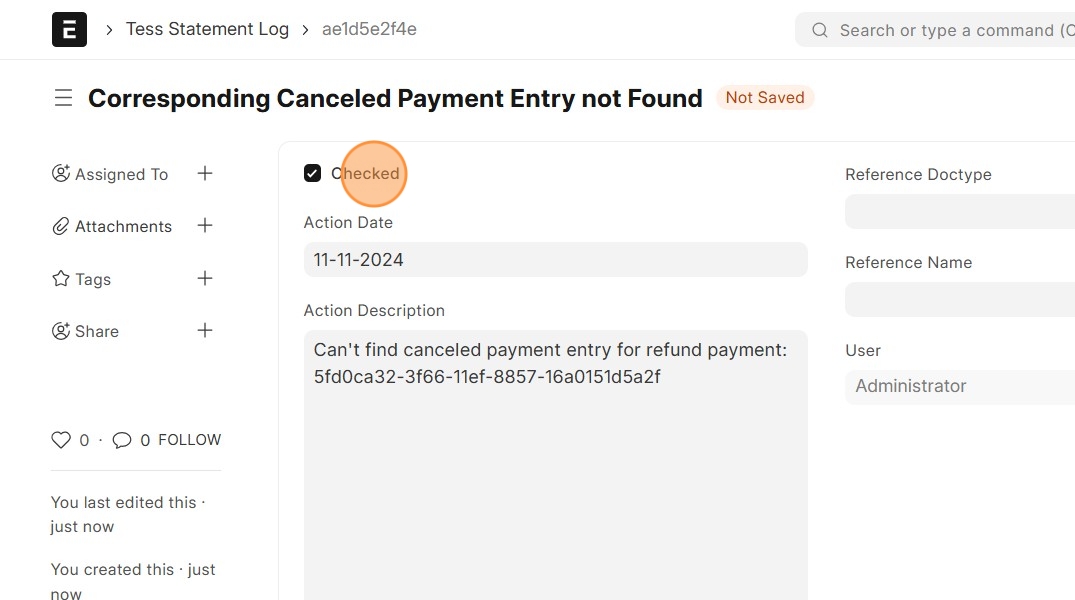
54. Click Save

55. The status will become Checked

56. And do the same with the other logs.

57.

Upload Tess Settlement report manually
58. For any reason, if you need to manually upload a Tess Settlement report at any time, you can do so from the Tess Statement page by clicking on Upload TESS Settlement Report

59. Upload the report ...

60. Click Upload

Alert: At any time, if you suspect an error or issue with the fetching and processing of Tess Settlement reports, you can check the Error Log by navigating to it using the search bar.